


If you want to transform your space with a touch of durable radiance, few materials can rival the luminous beauty of modern glass tiles. Whether you're considering a sleek kitchen backsplash, vibrant bathroom and shower walls, or your dream backyard pool, tiling with glass tiles offers a unique blend of sophistication and functionality–but there's more to it than meets the eye.
Tiling with glass tiles can elevate your home into a work of art, but the key to a successful installation lies in the details. Whether you choose to hire a professional installer or embark on a DIY project, understanding the intricacies of working with glass tiles is essential.

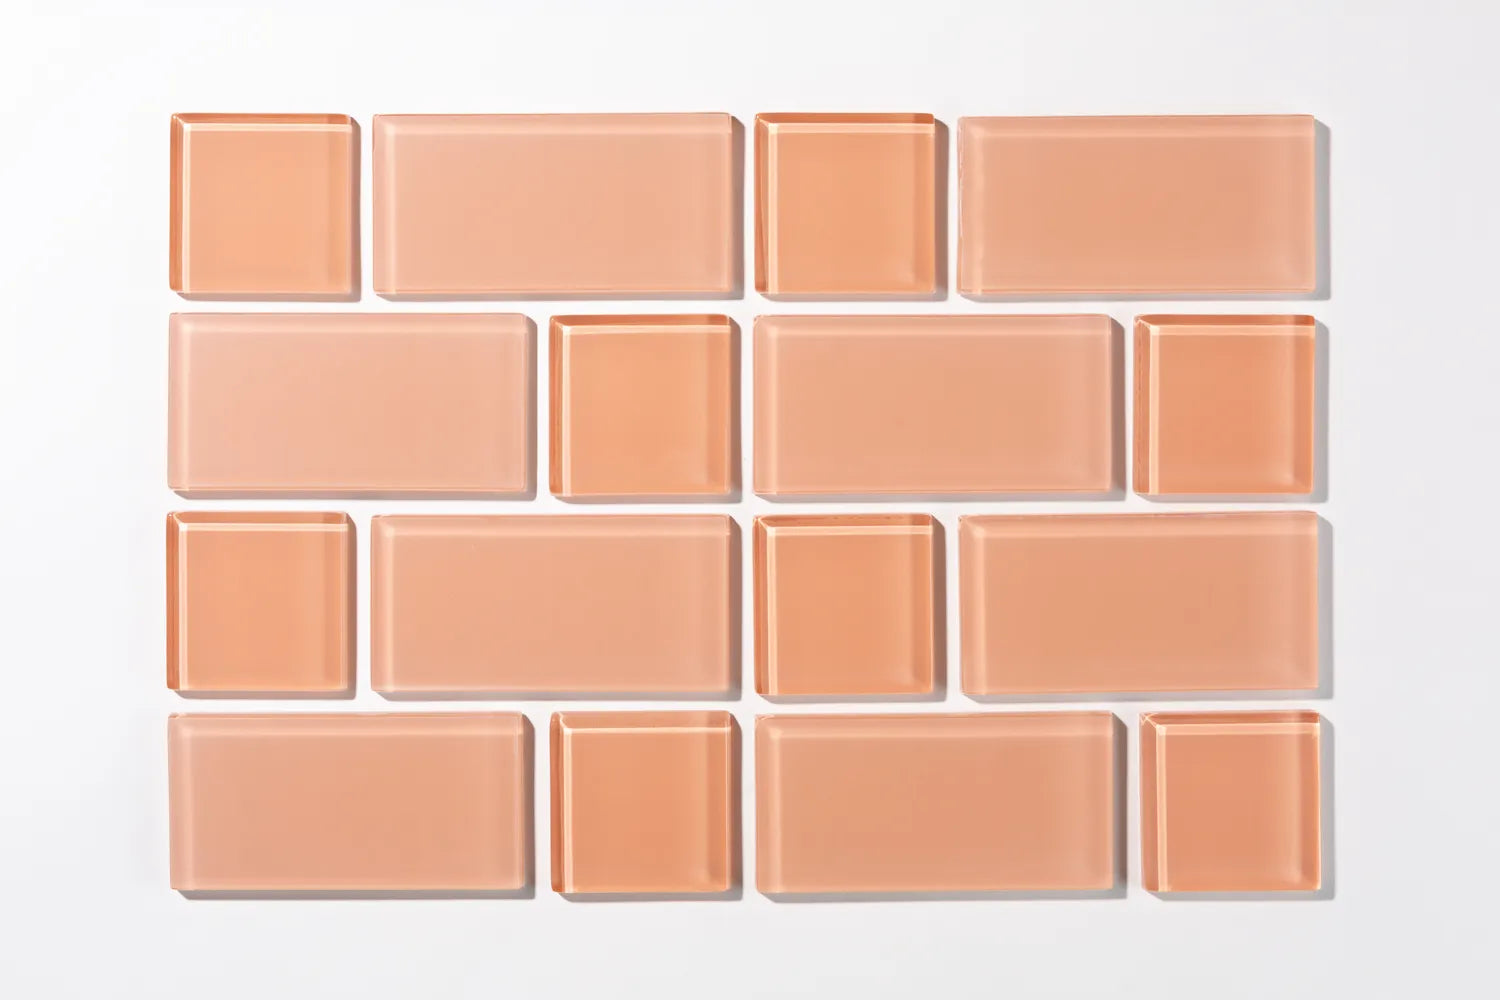
Tile: 2x6 Sparrow, Falcon, Oriole + Chickadee Gloss | Design: Benita Cooper Design | Installer: Sunflour Bakeshop
Today we're diving into the numerous benefits of glass tiles, discussing why we strongly recommend professional installation for this material, and finally providing a step-by-step guide for those determined to embark on a DIY installation journey. Let’s get into it!
Why Choose Glass Tiles?
Glass tiles are not just about aesthetic appeal–they also come with a host of practical benefits. At Fireclay, our glass tiles are a testament to quality and sustainability. Unlike most glass tiles on the market, our glass is 100% made in the USA at our Spokane, WA factory. As a certified B Corp (the first tile company to earn this certification!) we ensure our glass tiles are responsibly manufactured, aligning with our commitment to environmental and social responsibility.

Tile: 4x4 Egret Gloss | Design: Storey Design, Gao Design | Image: Henry Gao
One of the standout features of glass tiles is their reflective quality, which can make spaces appear larger and more open while adding a touch of luxury and modernity to any room. The durability of Fireclay’s glass tiles is unmatched–they can be used for both interior and exterior installations, including in very hot and freezing environments. They are also completely impervious, making them an excellent choice for wet areas like showers, pools and fountains.
Our glass tile collection offers a color lover's dream palette with 24 radiant colors, each available in both glossy and sumptuous matte finishes. This variety allows for creative freedom in designing intricate mosaics or clean modern lines. Despite their fragile appearance, glass tiles are incredibly durable once installed and resistant to stains, mold, and harsh chemicals, making them ideal for kitchens, bathrooms, pools, and beyond.

Why Hire a Professional Installer?
While glass tiles offer stunning aesthetics, their installation requires a high level of precision and expertise which is why we strongly encourage clients to hire a professional tile installer who is familiar with glass tile. As Martin Brookes, our Director of Installation, emphasizes, "Glass is a delicate material that can crack or chip easily during cutting and installation. Professionals have the experience and tools to handle glass tile with care, minimizing the risk of damage."

Tile: 2x6 Pheasant Gloss | Design: Fish & Co Studio | Image: Molly Rose Photo
Professionals ensure that the substrate is perfectly flat and rigid, which is crucial for the optimal adhesion of glass tiles. They also understand the specific requirements for setting materials and techniques that accommodate the expansion and contraction of glass tiles, preventing future issues. Proper selection and application of mortar are essential to achieving a strong bond and preventing discoloration. Moreover, professionals follow industry standards for movement joints, preventing stress and cracking in glass tile installations.
If the thought of finding a professional installer seems overwhelming, good news–here at Fireclay, we offer in-house professional installation services in select markets, with plans to expand nationwide. Our team of nationally acclaimed experts, headed by Martin, is dedicated to providing the highest quality service, ensuring your glass tile installation is as beautiful and durable as possible now and in the future. Find out more about Fireclay Tile Installation, and book a free consultation, here.

A Guide to Installing Glass Tiles
Although we strongly recommend hiring a professional installer, DIYing your glass tile installation is possible with precision and proper preparation. Keep in mind that installing glass tiles is different than installing ceramic, so don’t use standard ceramic tile installation methods as they may result in a finished installation with appearance and/or durability issues.
“Make sure you have the correct tools, safety equipment and setting materials for the installation,” Martin advises. “The diamond blade for cutting glass tile is specific for the job and there are many qualities of blades. Research carefully and pick a good quality blade like this one. Thin-set adhesive is also important. I like to use this glass tile thin-set and this for grouting.”
Safety is paramount when working with glass tiles. Always wear safety glasses and gloves, handle tiles with caution, and sand sharp edges immediately to prevent injury. Ensure proper ventilation and use non-abrasive cleaners for maintenance to keep your tiles looking their best. Once you have the proper equipment and are ready to start tiling, here are the steps you can take to install your glass tiles.

Tile: 2x2 Starling Gloss
Step 1: Substrate Preparation
Begin by preparing your substrate with a crack isolation membrane (ANSI A118.12) to prevent any movement from transferring to the tile. Ensure your substrate is well-cured, level, and stable. Avoid using thin-set to level the substrate under glass tiles, as this can lead to an uneven surface.
Step 2: Cutting Glass Tiles
When cutting glass tiles, having the right tools makes all the difference. Equip yourself with a wet saw fitted with a glass tile blade, or use hand-scoring tools if you prefer. Always wear safety glasses and gloves to protect yourself. Start by ensuring your work surface is clean to avoid scratching the glass. Keep the glass at a comfortable room temperature for easier cutting. When cutting, use plenty of water to keep the blade and tile cool, and orient the tile so that the blade rotates into the glazed side first to minimize chipping. After cutting, sand the edges to smooth out any sharpness.
Step 3: Drilling
Drilling into glass tiles requires precision and the right equipment. Use a drill or coring bit specifically designed for glass, and always wear safety glasses and gloves. To prevent overheating, use a guide for alignment and plenty of cooling water. Start drilling from the back of the tile and complete the hole from the front to avoid chipping.
Step 4: Installation
The installation process starts with applying a thin-set mortar. Back butter each tile to ensure it has adequate coverage, and use slight side-to-side pressure to collapse any ridges and achieve full contact. Keep grout joints at a minimum of 1/16th between tiles, and follow the TCNA guidelines for movement joints to accommodate expansion and contraction.
Step 5: Grouting
Make sure to choose a non-sanded urethane grout that’s recommended for glass tiles. Wear rubber gloves, use grout sponges and clean rags, and apply the grout with a soft float. After applying the grout, use cheesecloth to clean the tiles. Allow the grout to set before giving it a final clean to remove any haze.

Tile: 2x12 Starling Matte | Design + Image: Max Lowe
And that’s it! Enjoy your glass tile installation for years to come. If you require further information about any of these steps, our Glass Installation Guide provides more detail.

