


Stepping into a beautifully tiled shower is a treat for the senses. The smooth texture of the tile, the refreshing coolness underfoot, and the visual appeal of a well-designed pattern all contribute to a luxurious shower experience. But achieving this look requires careful planning and execution.
If you're considering tackling a tile shower installation yourself, understanding the process is key. In this guide, we'll break down the essential steps involved in installing tile in your shower, from selecting the right materials to grouting and sealing.

Tile: 4x8, 3x6 + 4x4 Antique, Ogee Dolomite | Design: 12 Eleven Design Co. | Image: Cory Fitzgerald
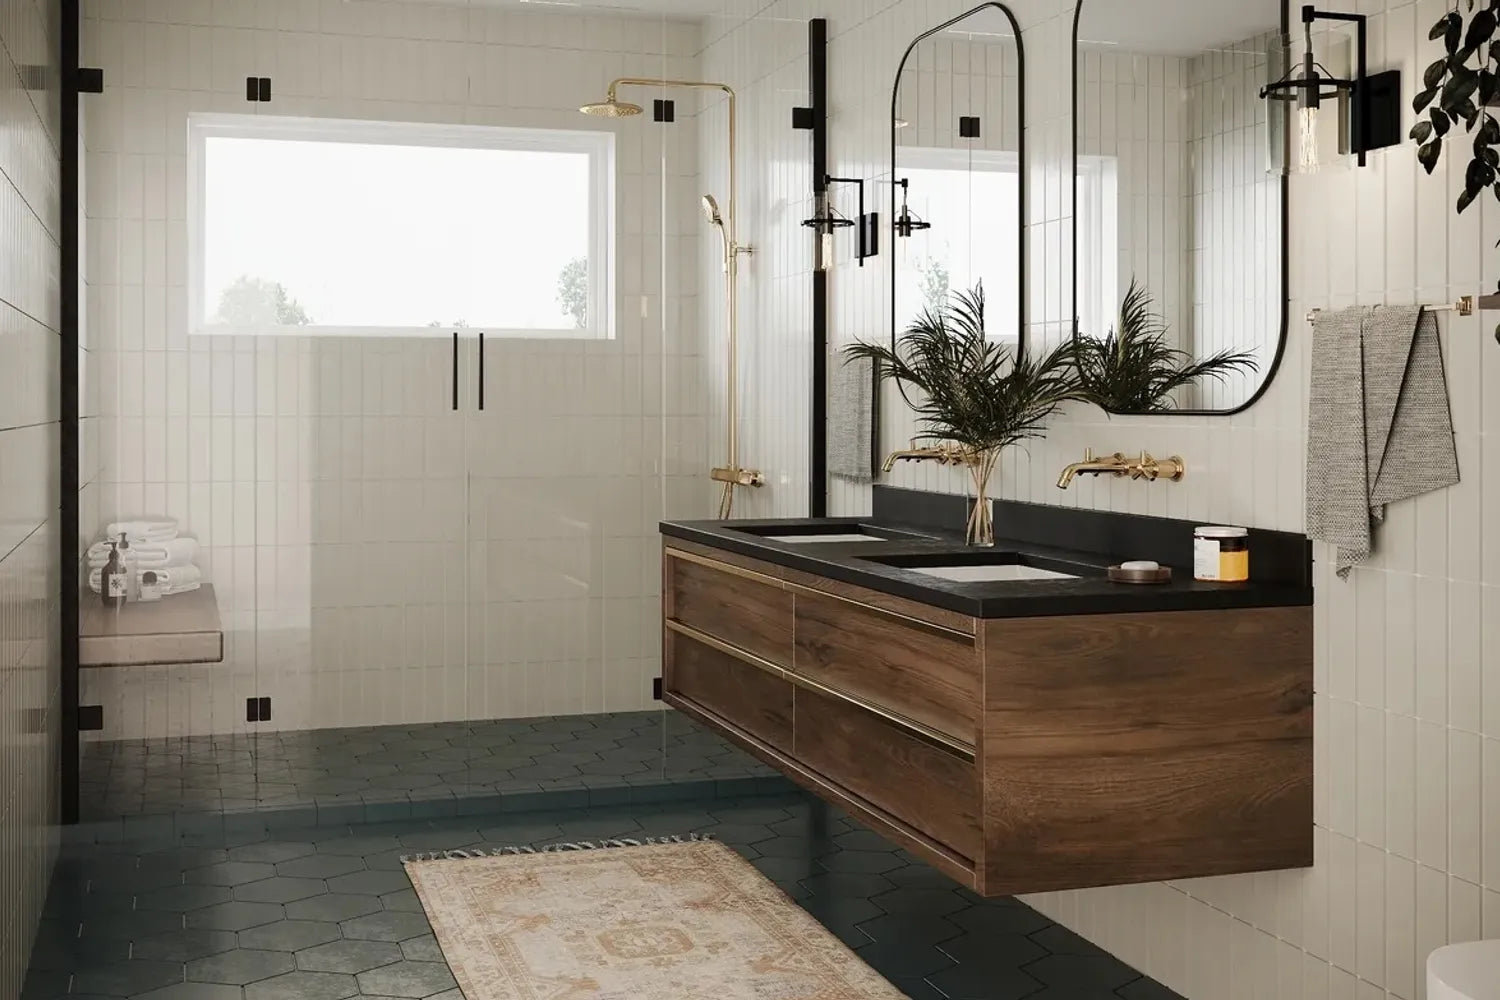
Tile showers are celebrated for their unique blend of beauty, durability, and versatility, offering a wide range of design possibilities and personalization. Whether you prefer the classic elegance of subway tiles, the intricate beauty of mosaics, or the sleek modernism of large-format tiles, there's a perfect tile to transform your shower into a stunning centerpiece of your bathroom.
Beyond aesthetics, tile is a robust material that can withstand the rigors of daily use in a wet environment. Its resilience to water, humidity, and temperature fluctuations ensures that your shower remains a source of lasting beauty and functionality.

Tile: 2x8 Mist | Design: Hearth Homes Interiors | Image: Public 311 Design
How to Select the Perfect Shower Tile
When it comes to narrowing down tile for your shower, there are several factors to consider. Our full product range–Ceramic Tile, Glazed Thin Brick, Glass Tile, and Handpainted Tile–are all excellent choices for shower walls, offering endless design options with over 40 handmade shapes and sizes and 100+ exclusive hand-mixed, lead-free colors to choose from.

Tile: 4x4 Egret Gloss, Dove Gloss, Sparrow Gloss, Snowy Owl Gloss, Rosy Finch Gloss, and Lark Gloss | Design: Oh Joy, Project M Plus | Image: Bethany Nauert
Specialty shapes like Star & Cross, Ogee Drop, Hexite, Picket and more create a design-forward shower rife with artisan characteristics. Don’t be afraid to play with pattern to create a unique design or even a focal point like a shower niche.

Brick: Absaroka | Design: Tricorn Black | Image: Zee Wendell | Installer: Will Tile
For shower floors, we recommend 3” sizes or smaller, as it offers the necessary slip resistance to ensure safety due to increased grout lines. Mosaic Tile, in Ceramic or Glass, is preferred for the shower pan–and since our Mosaic Tile comes pre-sheeted, it makes installation a breeze. If you’d like to add even more traction underfoot, our Original Ceramic Tile product line offers many beautiful, slip-resistant matte glazes.

Tile: 1x1 Sea Glass, Amalfi Coast Matte, Gypsum | Design: Jay Nelson, Rachel Kaye | Image: Mariko Reed
Larger tiles can make your shower feel more spacious, while mosaic tiles create a sense of intimacy. Make sure to consider the overall dimensions of your shower when making your selection.

Tile: 8x8 Dolce Cool Motif | Design: STUDIO GANZ | Image: Michele Lee Willson Photography
Another factor to consider is the brightness of your space and the colors of your tile. Light colors can enhance a small shower and brighten up a bathroom, while darker colors add a touch of drama. No need to be limited to one or even two colors–multi-hued showers create a stunning statement that brings a smile to your daily routine.

Tile: 4x4 Feldspar, Painted Sky, Evening Glow, Crater Lake Matte, Sunflower, Sea Glass, Tumbleweed | Design + Image: Gray Benko
The Key to A Beautiful Installation: Proper Prep
Proper preparation is vital to a successful tile installation. Before you begin, it’s essential to waterproof your shower and install cement board or backer board to provide a stable and water-resistant surface for your tiles to adhere to. Martin Brookes, our Director of Installation with 40 years of experience, emphasizes the importance of waterproofing: "Often, the crucial waterproofing aspect goes unchecked. Tile and grout, as an assembly, are merely a durable decorative surface and offer no waterproofing qualities."
“Whether using a ‘water-in, water-out’ system or a bonded membrane, testing these systems is critical for the longevity of your shower’s performance,” Martin continues. “Many choices exist, and the most important thing is to read the manufacturer’s instructions carefully after purchasing a system.”

Tile: 2x8 Desert Bloom + Limon. | Design: Handsome Salt | Image: Jenny Siegwart | Installer: Noble and Proper
If you aren’t sure which system to go with, Martin recommends a sealed system: “These systems offer superior performance and, when installed correctly, will provide a lifetime of enjoyment.”
“Remember, no grout, sealer, or caulk will save a leaky shower,” he warns. “Once it shows signs of leaking, it needs to be addressed immediately. Otherwise, the cost of structural damage, dry rot, and termites can be significant.”
Custom-Crafted Installation Services
While a DIY tile installation can be a rewarding project, professional installation offers expertise, precision, and peace of mind. Martin strongly recommends professional installation. “Hiring a qualified tile installer who understands waterproofing is crucial and should never be overlooked,” he advises. Fortunately, he heads up just the team to help.
Our Fireclay Tile Installation Services provide a comprehensive solution in select markets, ensuring your shower tile is installed flawlessly. Our expert installers are masters of their craft, bringing years of experience and meticulous attention to detail to every project.
Choosing Fireclay Installation not only means you’ll get a seamless installation process–you’ll also enjoy complimentary perks like a dedicated project manager, design renderings (a $350 value), our Installation Protection warranty (typically priced per order), and white-glove delivery into your space on the day of your installation so you don’t have to pay a shipping fee. And if you’re replacing a shower, our installers will remove the tile in your existing space and dispose of it for you.
Want to make your shower tile installation seamless and stress-free? Book a free consultation here.
How to Install Tile in Your Shower: A Step-by-Step Guide

Tile: 6x6 Ivory, 2x6 Red Rock | Design: Handsome Salt | Image: Jenny Siegwart | Installer: Noble + Proper
Now that you've laid the groundwork, let's move on to the tile installation process. Here's a step-by-step guide to help you achieve professional-looking results:
- Plan Your Layout: Start by dry laying your tiles on the floor to visualize the final look and plan your cuts. This will help you avoid awkward cuts and ensure a balanced layout.
- Apply Mortar: Using a notch trowel, apply a thin layer of mortar to a small section of the backer board, starting from the bottom. Work in small sections to prevent the mortar from drying out before you can place the tiles.
- Place Your Tiles: Carefully place your tiles onto the mortar, using tile spacers to maintain even grout lines. Press the tiles firmly into the mortar to ensure a strong bond.
- Cut the Tiles: Use a tile cutter or wet saw to cut the tiles to fit around corners, fixtures, and edges. Measure carefully and make precise cuts for a clean and professional finish.
- Grout the Joints: Once the tiles are set and the mortar has cured, apply grout to the joints using a grout float. Work the grout into the joints at a 45-degree angle to ensure complete filling.
- Clean the Excess: Wipe away any excess grout with a damp sponge before it dries completely. This will prevent haze and ensure a clean, polished look.

Tile: 6x6 Ivory, 2x6 Red Rock | Design: Handsome Salt | Image: Jenny Siegwart | Installer: Noble + Proper
